1. Installation 🔗
Download the Drupal Plugin SDK zip.
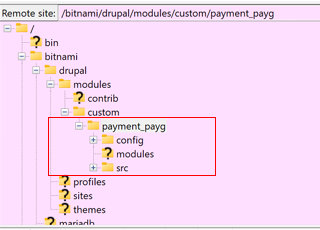
Unzip the Drupal SDK file and place it at '../drupal/modules/custom' Directory as below.
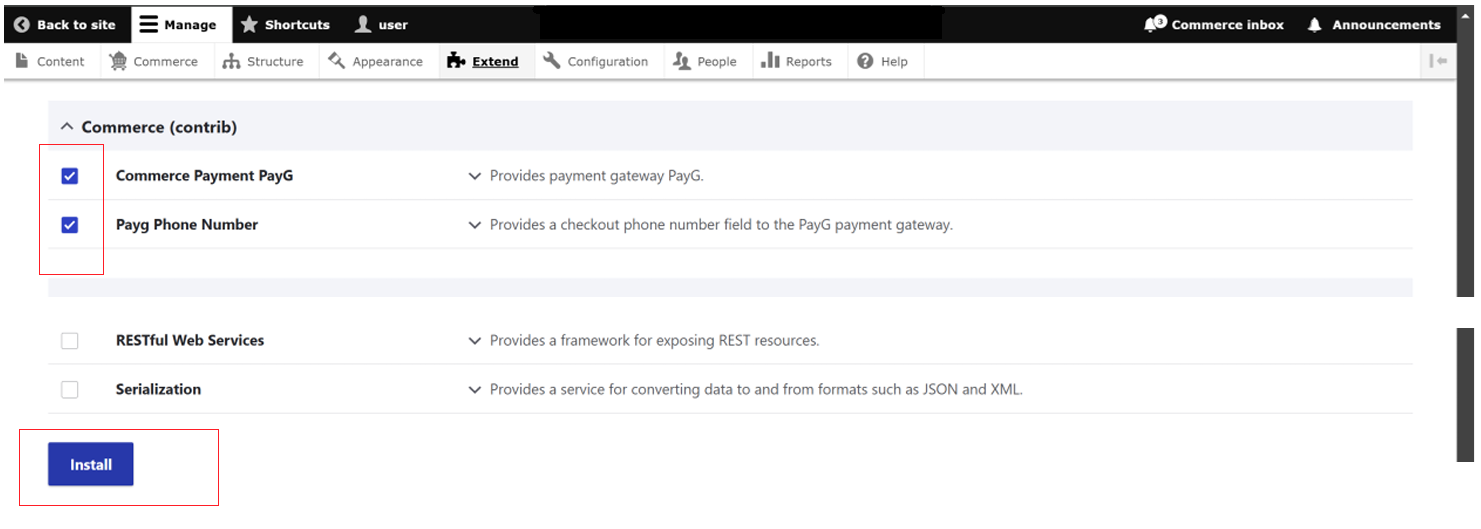
After Uploading the PayG payment is also Visible on Drupal Website at 'extend' module from Manage tab in Admin panel:
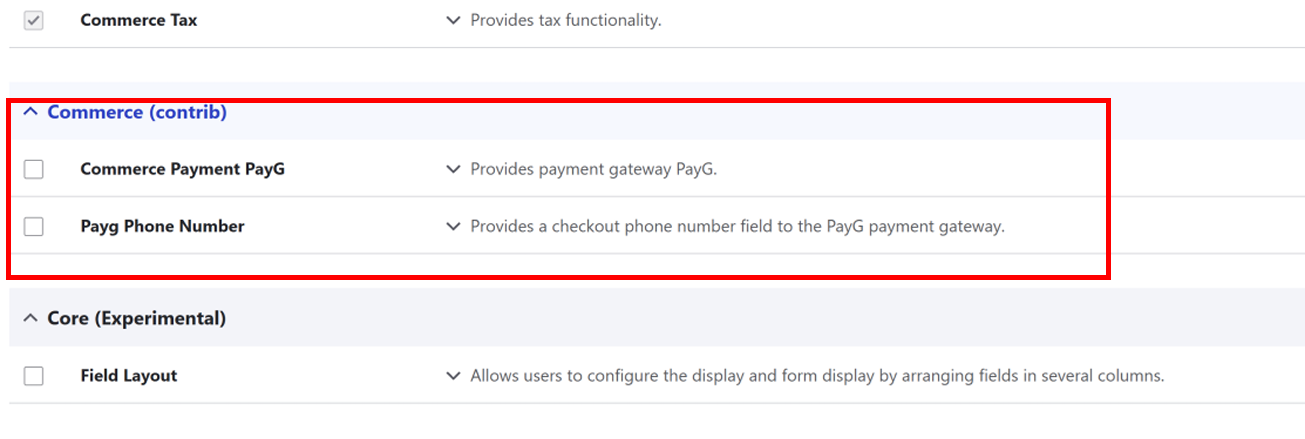
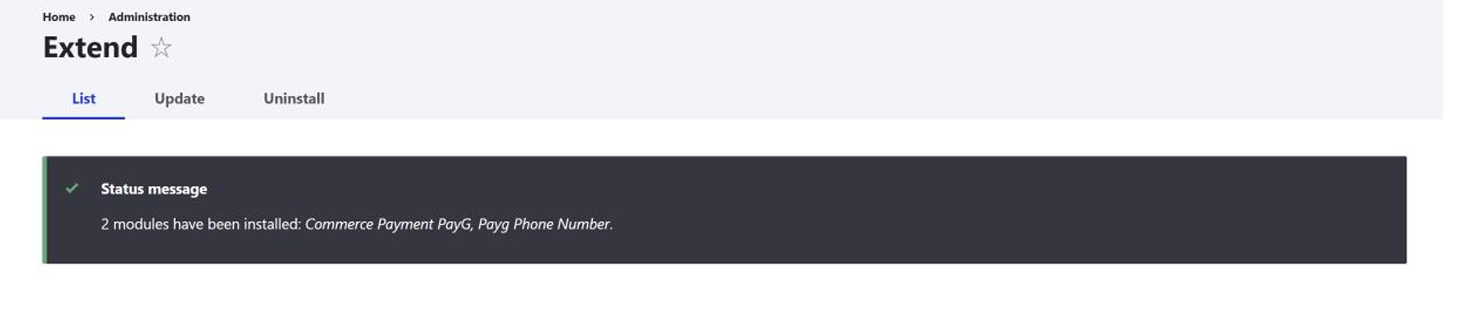
Click on checkbox for both files 'commerce payment payg' & 'payg phone number' and click on 'Install' button Below.
Installation Succesfull.
Or you can also install using Server CLI
Run command 'drush en commerce_payment_payg' from the server terminal to install the module.

2. Configuration 🔗
Login into your Drupal Project as administrator.
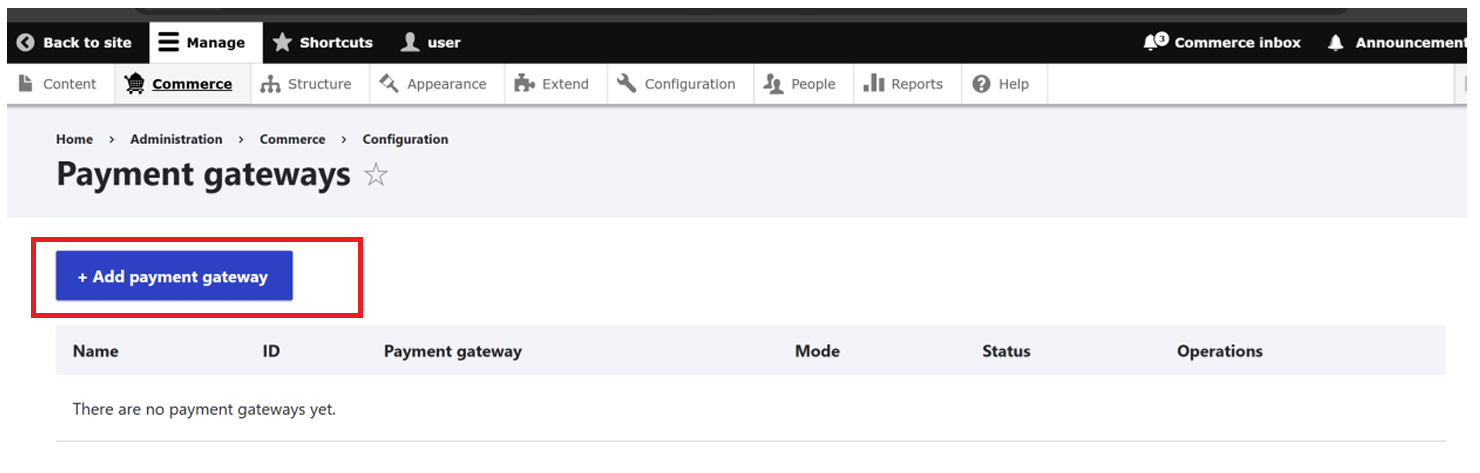
Navigate to Stores -> Manage -> Commerce -> Payment gateways -> Click on 'Add payment gateway' button.
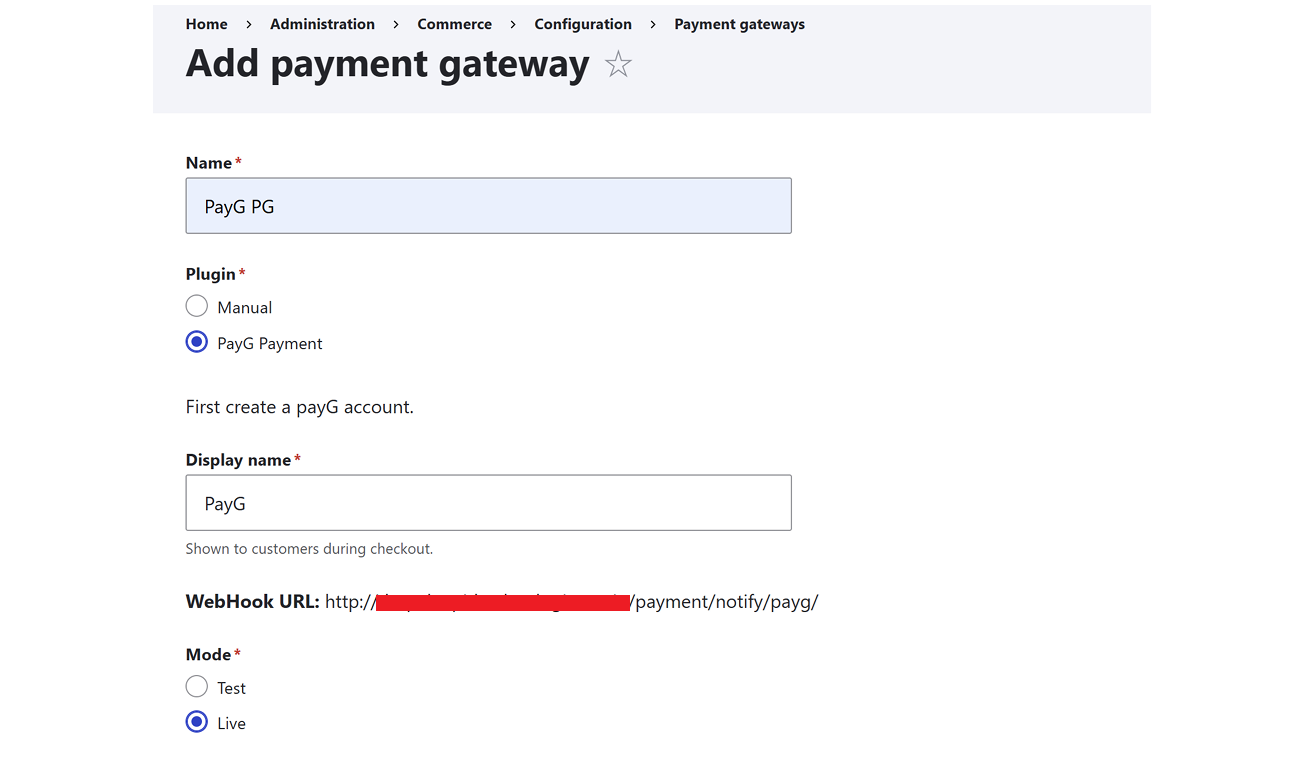
Configure the form using PayG Details.
Plugin: Select PayG Payment
Mode : Select Live Mode.
Redirect Method: Redirect via Post
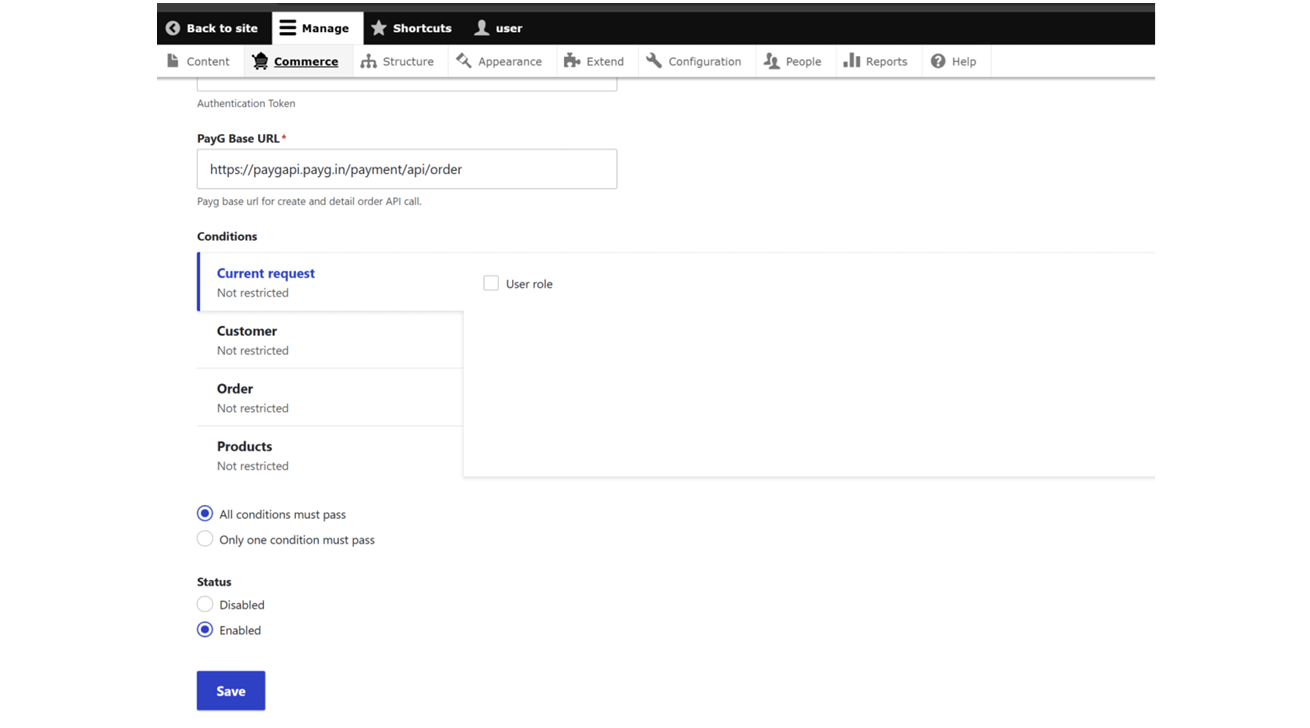
MID : Your merchant MID got from PayG.
AuthenticationKey: Your AuthenticationKey got from PayG.
AuthenticationToken: Your AuthenticationToken got from PayG.
PayG Base URL: 'https://paygapi.payg.in/payment/api/order'
Click on Save button.
After Clicking on Save button the module configured with PayG Authentications Details and Saved.
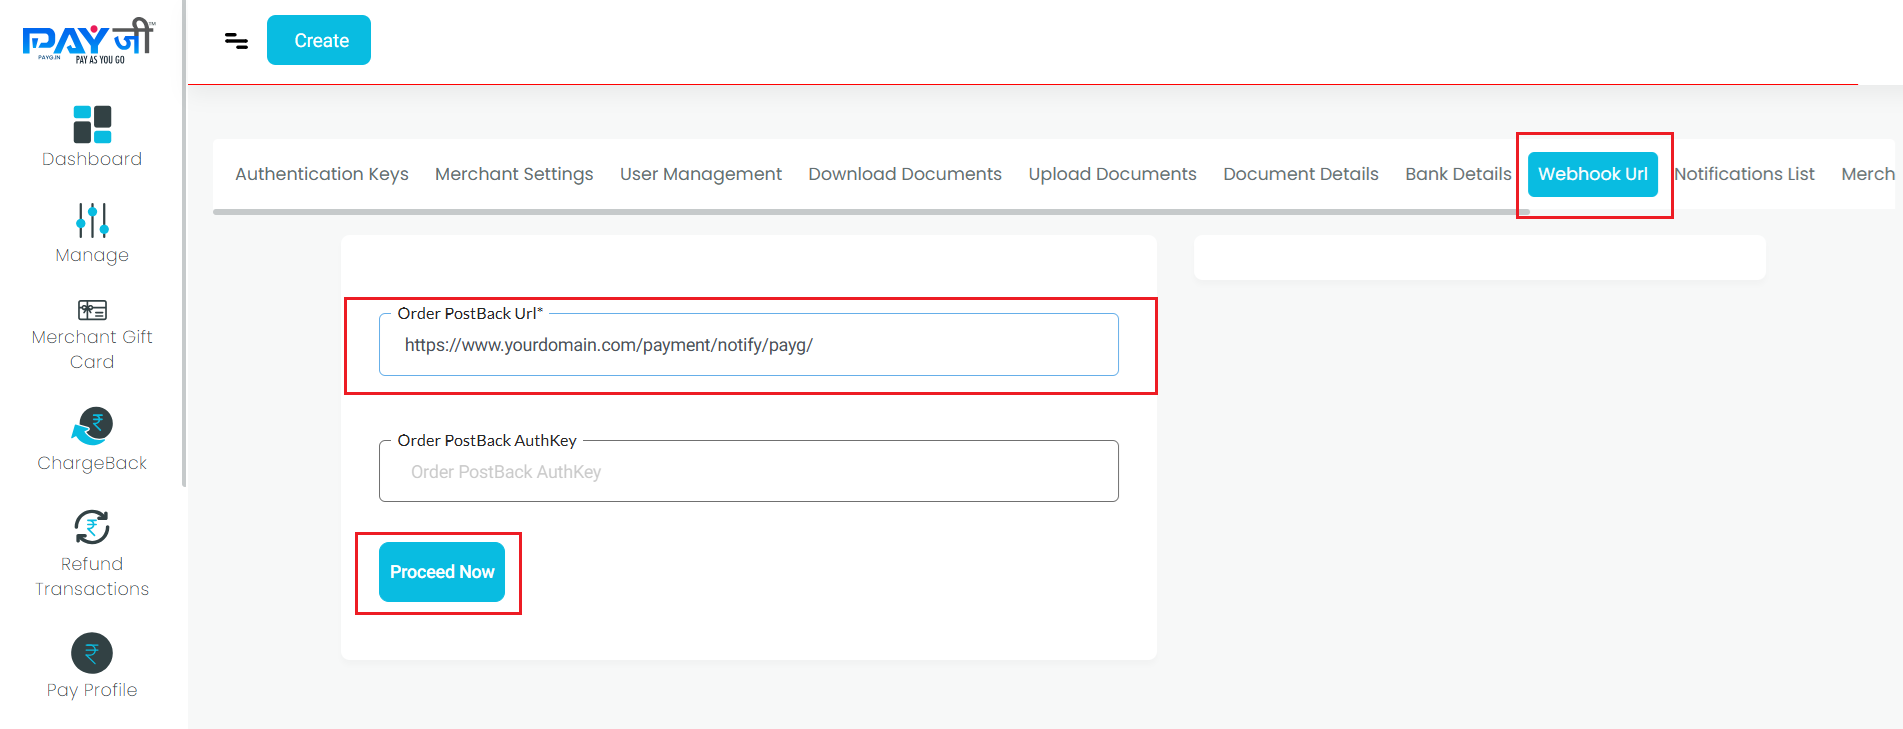
To configure Webhook URL : Add WebHook URL provided by drupal in Your PayG Dashboard
Go to Setting -> Webhook Url -> Click on Edit.
Order PostBack Url: 'https://www.yourdomain.com/payment/notify/payg/'
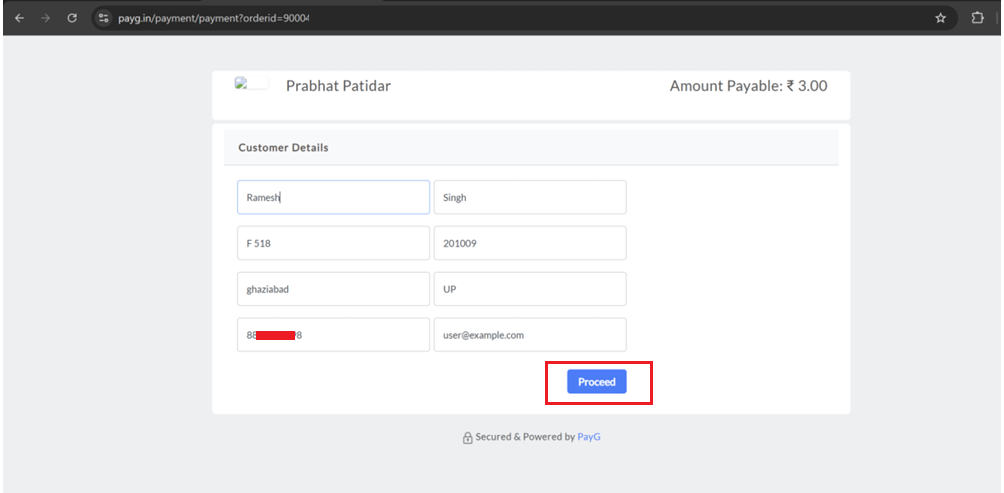
3. Checkout Page 🔗
After Succesful configuration using above steps, PayG Payments can be used on checkout pages.
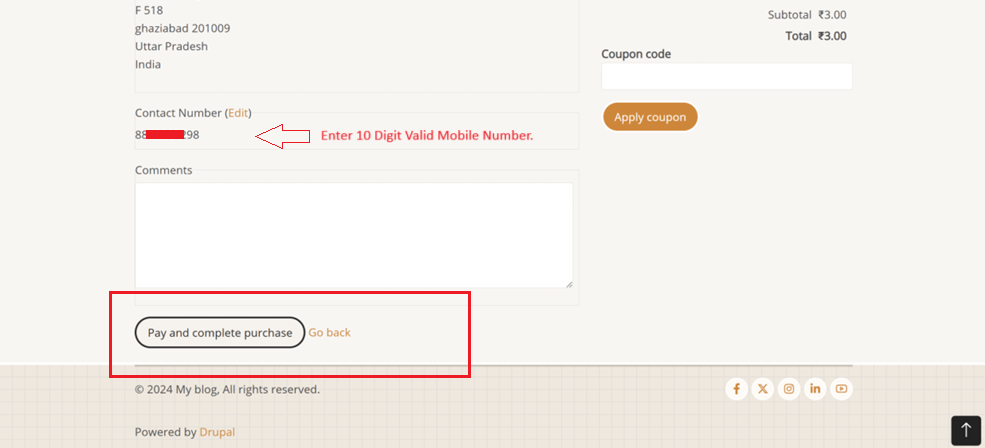
Redirected to PayG Payment Page. Choose the Payment Methods and make the payment.